Here is the tutorial I promissed a year ago. Give it a try and let me know what you think! email me in case you have some trouble with the tutorial. I also have a pdf of the tutorial in case you want it, just email me and I will send it to you asap!
Supplies:
½ yard
of fabric
1 towel (I used a towel from IKEA
with 28 x 55’’)
44’’ of cotton ribbon (1 and ¼
inch wide)
1 yrd cotton cord
2 Strap slides
1 cotton cord
Scissors, rotary cutter, cutting
mat, safety pin, pins.
Take your fabric and
cut 2 of each:
Back pack main panel: 11 x 12’’
Cord carrier: 2 x 11’’
Back pack straps: 5 x 18’’
Fold one of your cord carriers/casings in half, wrong sides together and press to create a crease
Fold one of your cord carriers/casings so that its length is 1/2 inch shorter than your main panel’s smaller side. Press
Fold again in half, with the folded short edges turned inside. Place on the shorter edge of your main panel.
Pin in place making sure the short edges of the cord carrier stay 1/4 inch away from the long edge of the main panel
Cut two 6 ½’’ pieces of ribbon and place each on the long edge of the main panel, opposite to the cord carrier, as the figure shows. Be certain to place them at an angle and 1/4 - 1/2‘’ away from the short edge.
Put the remaining main panel on top of the first one, with right sides together and pin all around it. Don’t forget to mark where you start and stop, so that you leave an opening when sewing for turning.
At this point you should have a sandwich with the 2 main panels, 1 cord carrier on the top and 2 pieces of cotton ribbon on the long edges near the bottom on the opposite side of the panel from the cord carrier.
At this
point you can add a tag wherever you want.
Sew all around the big rectangles remembering to leave an opening. Stitch back and forth on top of the cotton ribbon to strengthen the seams.
Cut any extra ribbon
and the corners.
Turn inside out and
smooth the seams. This is how it should look now.
Edge stitch the cord
carrier. Now let’s work on
the straps.
Fold each strap piece in half with right sides together and sew the
long edges. Turn each
strap inside out.
Now take the
remaining cotton ribbon and cut 1 piece for each starp. The pieces of ribbon
should be the length of the starp minus 1/2 inch.
Edge sew each ribbon
piece to the starp.
This is how your
straps should look like at this point
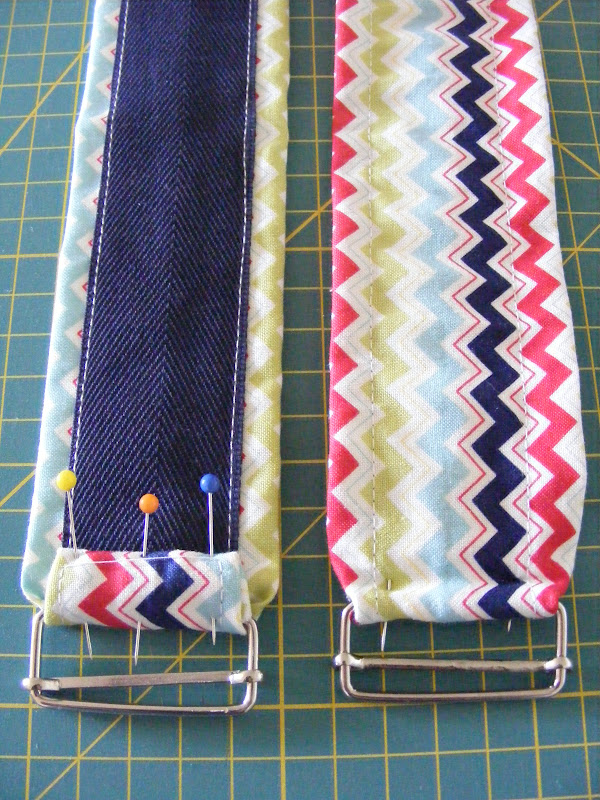
Now, let’s attach
the strap slides. Do this for
each strap.
Insert strap in the strap slide as shown in the picture. Fold the end of the strap that is ribbon free ½ inch and again another ½ inch to enclosure the raw edge.
Sew the strip slide in place with a short zig-zag stitch back and forth a couple of times to give some strength to the seam.
We now have two straps
finished
Now let’s place the
main piece on top of the towel. Make sure you place it in a bottom corner and
follow the finished edge of the towel. Don’t forget that the attached ribbon
goes in the bottom of the towel while the cord carrier goes up.
Take the cotton
ribbon and turn it inside. Repeat for both sides.
Pin the main piece to the towel half way up the sides.
Mark the place where
the cord carrier attached to the main piece touches the towel. This is very
important because it will mark the place to attach the other cord carrier
directly on to the towel
Take the last cord
carrier (at this point this should the only piece of fabric left) and fold the
long edges ¼ inch to the wrong side. Press to create a crease. Fold in half and
press.
Now, using the pins
as guides, place the above mentioned cord carrier and place it on top of the
towel.
Make sure you leave ¼ inch for seam allowance and fold the short edges so they meet the guiding pin.
When in the right
position, pin in place and sew the bottom long edge of the cord carrier to the
towel.
At this point you
should consider using a matching thread in your bobbin so that it will not show
on the other side of the towel.
Sew a straight line
along the crease.
After sewing the
straight line, fold the edge to the wrong side of the fabric and press.
Mark the middle of
the recently attached cord carrier and place the straps starting from the
middle point.
Pin in place and
baste stitch
Fold the free long
edge along the previously marked ¼ inch crease and fold the cord carrier in
half again, making sure the long edges are turned in. (As in the picture)
Pin in place and
edge stitch, making a double passage on top of the straps to provide more
strength to the seam.
The worst part is
over and you can now take a deep breath.
Remember we only
pinned the main panel half way? Now let’s place the straps between the main
panel and the towel.
Make sure your cord
carriers are sewed correctly. They should be falling right on top of each
other!
Pin in place all around the rectangle, leaving only the edge with the cord carrier free. Sew all around three
edges, leaving the edge with the cord carrier free.
Take the safety pint
and attach it to the cord. Pass the cord trough
the cord carriers.
Insert the cord stop tie a knot with both
cord ends.
And we are almost
finished!
Turn your main panel
inside out and place the towel inside the space left between the main panel and
the towel: that is our backpack!
Finish the raw edges
of the two pieces of ribbon. I finished mine with a zig zag stitch made with
contrasting thread. Do as you please at this point. Pass the ribbon
trough the strap slides as
shown in the picture.
And there you go,
DONE!
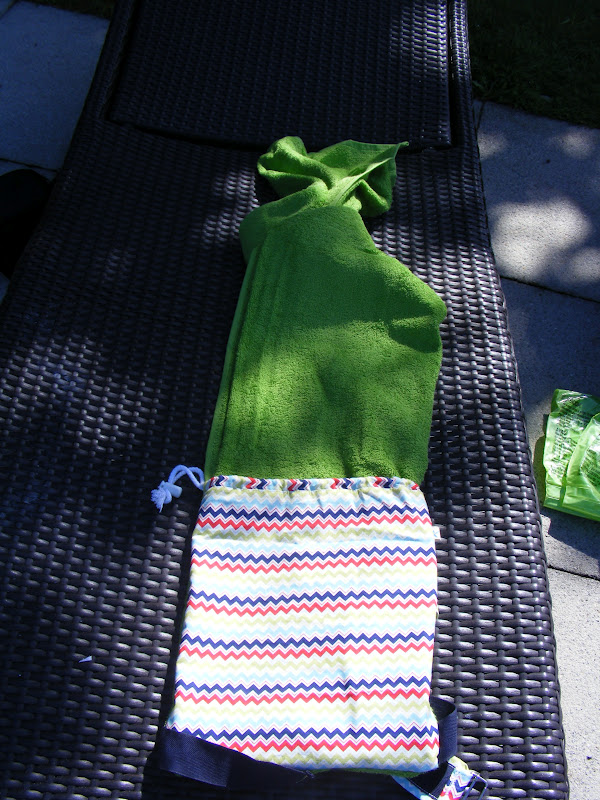
Now it’s time to
take it to the pool side, for a ride!
I would like to ask you all not to pin or share pictures of my kids and
to please give me credit whenever you use my tutorial, a simple link to
the blog is enough. In case you want to make these to sell please let me
know. Enjoy!